
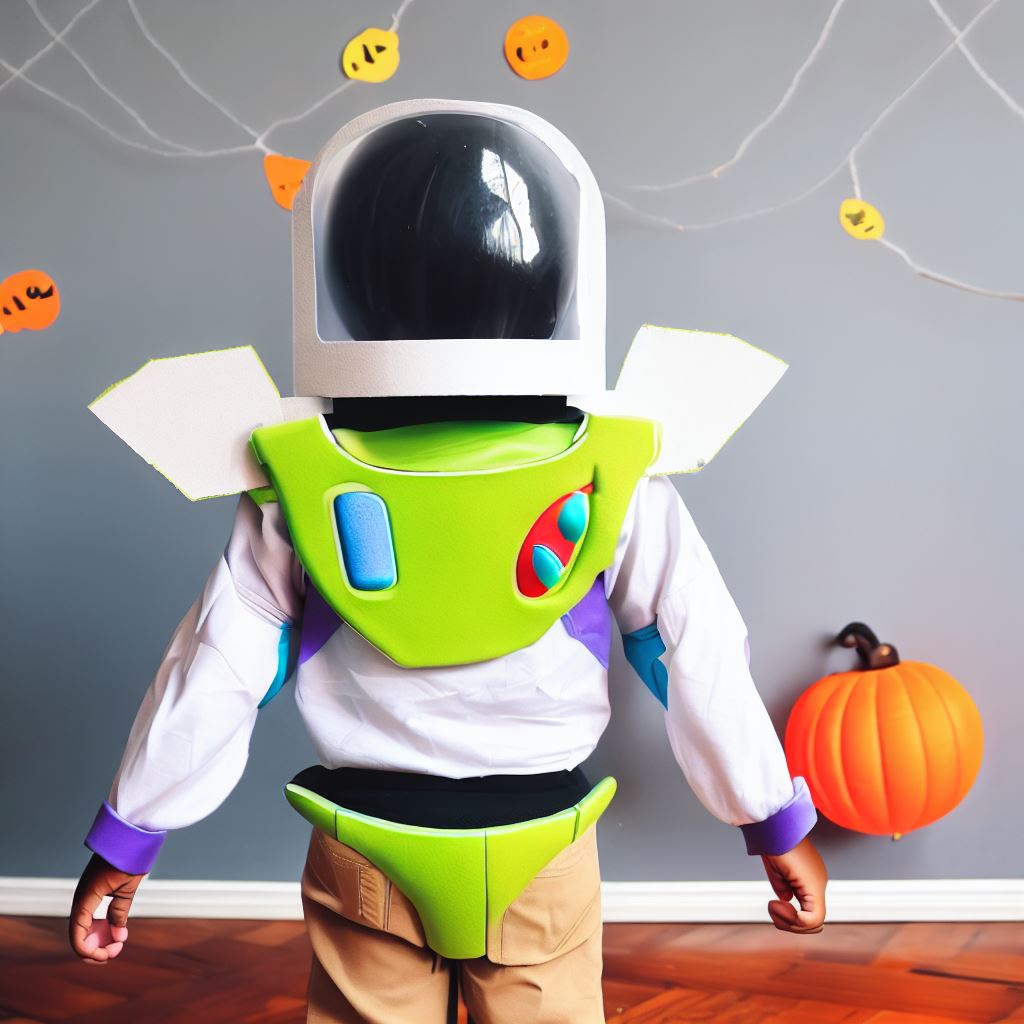
How I Made a DIY Buzz Lightyear Costume for Under $20
Do you love Toy Story? Do you want to dress up as your favorite space ranger for Halloween? Do you have a tight budget and a creative spirit? If you answered yes to any of these questions, then this article is for you. I will show you how I made a DIY Buzz Lightyear costume for under $20 using some simple materials and tools. You will be amazed by how easy and fun it is to make your own DIY Buzz Lightyear costume.
Why Make a DIY Buzz Lightyear Costume?
There are many reasons why you might want to make a DIY Buzz Lightyear costume instead of buying one from the store. Here are some of them:
- You can save money. A store-bought Buzz Lightyear costume can cost anywhere from $30 to $100 or more, depending on the quality and size. A DIY Buzz Lightyear costume can be made for less than $20, and you can use some items that you already have at home or can find at thrift stores or dollar stores.
- You can customize it. A store-bought Buzz Lightyear costume might not fit you well, or it might not have the exact details that you want. A DIY Buzz Lightyear costume allows you to adjust the size, shape, color, and design of your costume to suit your preferences and personality. You can also add some accessories or features that are not included in the original Buzz Lightyear costume, such as a jet pack, a laser, or a voice changer.
- You can have fun. Making a DIY Buzz Lightyear costume is a great way to express your creativity and have fun with your family or friends. You can enjoy the process of planning, designing, cutting, gluing, painting, and assembling your costume. You can also show off your skills and impress your guests with your homemade masterpiece.
Also Read: The Ultimate Guide to Creating Your Own Belle Costume at Home

What Do You Need to Make a DIY Buzz Lightyear Costume?
To make a DIY Buzz Lightyear costume, you will need the following materials and tools:
- A white long-sleeved shirt
- A pair of white pants
- A pair of white gloves
- A pair of white shoes
- A green hooded sweatshirt
- A purple plastic tablecloth
- Some cardboard
- Some duct tape
- Some scissors
- Some glue
- Some paint (white, green, purple, red, black)
- Some paint brushes
- Some markers
- Some velcro
- Some elastic bands
How to Make a DIY Buzz Lightyear Costume?
Now that you have gathered all the materials and tools, you are ready to make your DIY Buzz Lightyear costume. Here are the steps to follow:
Step 1: Make the Helmet
The helmet is one of the most important parts of the DIY Buzz Lightyear costume, as it gives you the look of a space ranger. To make the helmet, you will need to use the cardboard, the duct tape, the scissors, the glue, the paint, and the paint brushes.
- First, cut out two pieces of cardboard that are slightly larger than your head. Then, cut out a hole in each piece that matches the shape and size of your face. Next, tape the two pieces together along the edges to form a dome shape. Make sure that there is enough space inside for your head to fit comfortably.
- Next, cut out another piece of cardboard that is about 12 inches long and 4 inches wide. This will be the visor of your helmet. Bend it slightly in the middle to create a curve. Then, glue it to the front of your helmet above the hole for your face.
- Next, paint your helmet white all over. Let it dry completely before moving on to the next step.
- Next, use a marker to draw some details on your helmet, such as the eyes, the eyebrows, the nose, and the mouth. You can also add some stickers or decals if you want.
- Finally, use some velcro to attach some elastic bands to the sides of your helmet. These will help you secure your helmet on your head.
Step 2: Make the Chest Plate
The chest plate is another essential part of the DIY Buzz Lightyear costume, as it displays your name and rank as a space ranger. To make the chest plate, you will need to use the cardboard, the duct tape, the scissors, the glue, the paint, and the paint brushes.
- First, cut out a piece of cardboard that is about 18 inches long and 12 inches wide. This will be the base of your chest plate.
- Next, cut out another piece of cardboard that is about 16 inches long and 10 inches wide. This will be the front of your chest plate.
- Next, glue the front piece to the base piece, leaving a 1-inch border around the edges.
- Next, paint your chest plate white all over. Let it dry completely before moving on to the next step.
- Next, use a marker to write your name and rank on the front of your chest plate. You can also add some stickers or decals if you want.
- Finally, use some velcro to attach some elastic bands to the sides of your chest plate. These will help you wear your chest plate on your chest.
Step 3: Make the Arm Bands
The arm bands are another important part of the DIY Buzz Lightyear costume, as they contain some buttons and gadgets that you can use as a space ranger. To make the arm bands, you will need to use the cardboard, the duct tape, the scissors, the glue, the paint, and the paint brushes.
- First, cut out two pieces of cardboard that are about 12 inches long and 4 inches wide. These will be the bases of your arm bands.
- Next, cut out two pieces of cardboard that are about 10 inches long and 3 inches wide. These will be the fronts of your arm bands.
- Next, glue the front pieces to the base pieces, leaving a 0.5-inch border around the edges.
- Next, paint your arm bands white all over. Let it dry completely before moving on to the next step.
- Next, use a marker to draw some buttons and gadgets on your arm bands. You can also add some stickers or decals if you want.
- Finally, use some velcro to attach some elastic bands to the ends of your arm bands. These will help you wear your arm bands on your arms.
Step 4: Make the Leg Bands
The leg bands are another essential part of the DIY Buzz Lightyear costume, as they add some color and style to your outfit. To make the leg bands, you will need to use the purple plastic tablecloth, the scissors, and some glue.
- First, cut out two pieces of purple plastic tablecloth that are about 12 inches long and 6 inches wide. These will be your leg bands.
- Next, fold each piece in half lengthwise and glue the edges together to form a tube shape.
- Next, cut out some slits along the bottom edge of each tube to create some fringes.
- Finally, slip each tube over your shoes and up to your ankles. You can use some glue or tape to secure them if they are too loose.
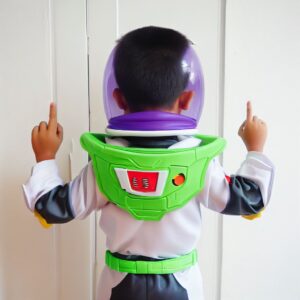
Step 5: Make the Wings
The wings are another essential part of the DIY Buzz Lightyear costume, as they give you the ability to fly in space. To make the wings, you will need to use the cardboard, the duct tape, the scissors, the glue, the paint, and the paint brushes.
- First, cut out two pieces of cardboard that are about 18 inches long and 12 inches wide. These will be the bases of your wings.
- Next, cut out two pieces of cardboard that are about 16 inches long and 10 inches wide. These will be the fronts of your wings.
- Next, glue the front pieces to the base pieces, leaving a 1-inch border around the edges.
- Next, paint your wings white all over. Let it dry completely before moving on to the next step.
- Next, use a marker to draw some details on your wings, such as some stripes and stars. You can also add some stickers or decals if you want.
- Finally, use some duct tape to attach your wings to the back of your green hooded sweatshirt. Make sure that they are aligned and balanced.
Step 6: Add Some Finishing Touches
Now that you have made all the main parts of your DIY Buzz Lightyear costume, you can add some finishing touches to make it more realistic and fun. Here are some suggestions:
- Wear a white long-sleeved shirt under your green hooded sweatshirt.
- Wear a pair of white pants under your purple leg bands.
- Wear a pair of white gloves on your hands.
- Wear a pair of white shoes under your purple leg bands.
- Use some paint or markers to add some details to your shirt, pants, gloves, and shoes, such as some buttons, buckles, patches, or logos.
- Use some glue or tape to attach some accessories or features to your costume, such as a jet pack made from a soda bottle or a cardboard box, a laser made from a flashlight or a toy gun, or a voice changer made from a walkie-talkie or a smartphone.
- Use some hair gel or spray to style your hair in a spiky or slicked-back way.
- Use some makeup or face paint to add some color or effects to your face, such as some blush or glitter.
How to Rock Your DIY Buzz Lightyear Costume?
Now that you have made your DIY Buzz Lightyear costume for under $20, you are ready to rock it at any Halloween party or event. Here are some tips on how to make the most of your costume:
- Practice some poses and expressions that match Buzz Lightyear’s personality and catchphrases, such as “To infinity and beyond!” or “Buzz Lightyear to the rescue!”
- Interact with other people who are dressed as Toy Story characters, such as Woody, Jessie, Rex, or Bo Peep. You can pretend to be friends or enemies, depending on the situation.
- Have fun and be confident in your DIY Buzz Lightyear costume. You have worked hard to make it, and you deserve to enjoy it. Remember, you are a space ranger, and nothing can stop you.
Conclusion
Making a DIY Buzz Lightyear costume for under $20 is not only possible, but also easy and fun. You can use some simple materials and tools that you can find at home or at cheap stores. You can also customize your costume to fit your preferences and personality. You can also add some accessories or features that make your costume more realistic and fun. By following the steps and tips in this article, you can make your own DIY Buzz Lightyear costume and rock it at any Halloween party or event. You will surely impress your guests and have a blast.
So, what are you waiting for? Grab your materials and tools, and start making your DIY Buzz Lightyear costume today. You will be glad you did. To infinity and beyond!


One thought on “How I Made a DIY Buzz Lightyear Costume for Under $20”